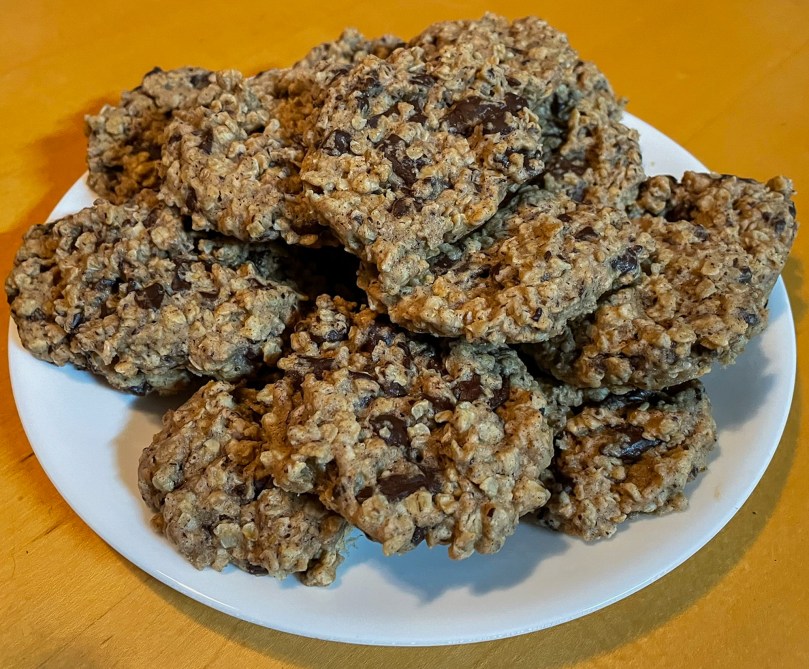
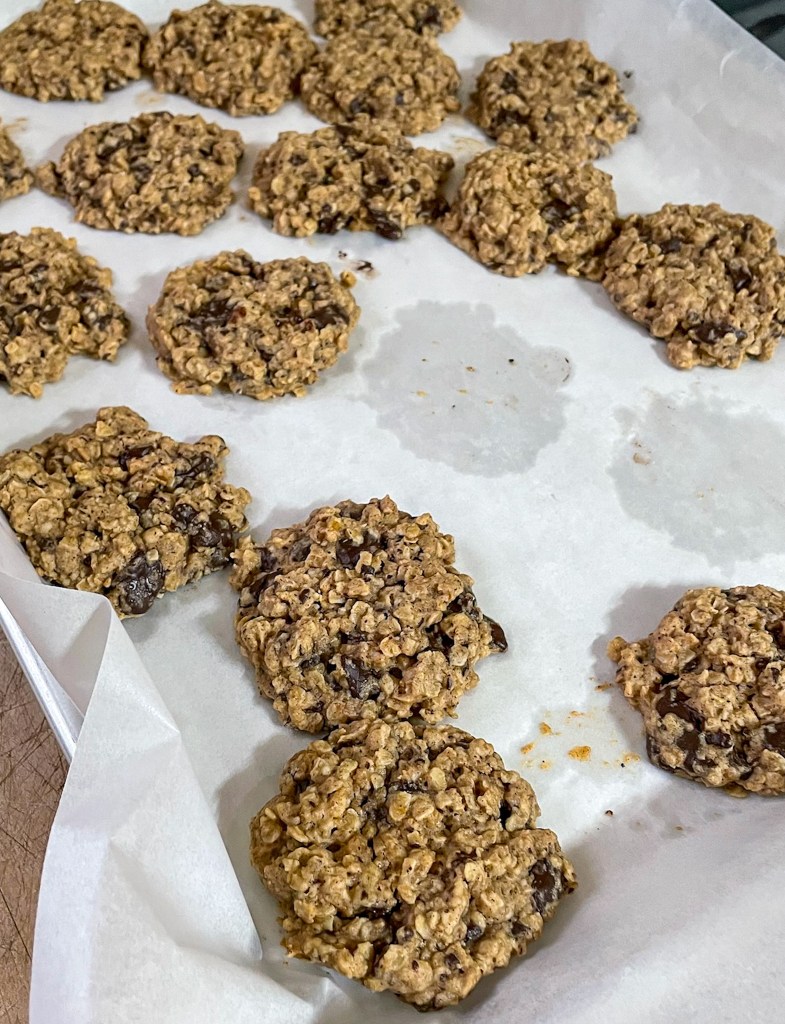
Chia Pudding

Chia Pudding

  • Servings: 1 Serving
  • Difficulty: Easy
  • Print

Healthy snacks that are good and leave you satiated are few and far between. Here is one I found.

Ingredients

  • 2 tbsp of chia seeds
  • 1 tsp honey
  • 1/2 cup of milk of choice (I used almond milk)
  • Strawberries or other fruits for toppings

Directions

  1. Pour all ingredients into a 500 ml or 2 cup mason jar and mix well.
  2. Let settle for 2-3 minutes and then mix again very well until you see no clumping.
  3. Cover the jar and store in fridge overnight or for at least 2 hours.
  4. When you are ready to eat it, top with your favorite fruit and enjoy cold.

Nutritional facts per serving

  • Calories 155
  • Fat 9 g
  • Sugar 6 g
  • Carbohydrates 16 g
  • Protein 5 g
  • Fibre 9 g

This is a great snack that you can make up to a week in advance. So you make them on Sunday night and you have desserts or snacks for your lunches all week. It is very versatile. You feel for strawberries one day, the next you put in some cinnamon and vanilla and top it with apples, and so on. If you don’t like almond milk, you can substitute to any milk you like. Same with the sweetener. (Nutritional values are based on honey and almond milk) I would recommend a topping as it is very bland on it’s own.

Let you imagination soar, have fun and make it your own.

Easy Pineapple Cake

Easy Pineapple Cake

  • Servings: 8 Large Servings
  • Difficulty: Easy
  • Print

When making a Hawaiian theme dinner, a must have is a pineapple cake for dessert. I tried a couple of different ideas and this one was the easiest and most delicious option. This is a sweet, moist cake that you can frost or have as is. The nutritional value is without the icing.

Ingredients

  • 1-½ cups of sugar
  • 2 cups of flour (I used unbleached)
  • 2 tsps of baking soda
  • 20 oz can of crushed pineapple with juice
  • 2 eggs
  • 1 tsp of vanilla extract (optional

Directions

  1. Preheat oven to 350 and grease bundt pan.
  2. In a large bowl, combine flour, sugar and baking soda, mix well.
  3. In another bowl mix pineapple, eggs and vanilla.
  4. Add wet ingredients to the flour mixture and mix well.
  5. Pour into prepared pan.
  6. Bake for approximately 45 minutes or until toothpick comes out clean.
  7. Let cool a bit and put cream cheese frosting or other icing of your choice or serve as is.

Nutritional facts per serving

  • Calories 317
  • Fat 1.1 g
  • Sugar 48 g
  • Carbohydrates 72 g
  • Protein 5.1 g
  • Fibre 2.0 g

Ok, like I said these are very large pieces. As is, this is not a dessert you want to be having daily. It is high in carbs and sugar. Not for the diabetics. I actually made 16 pcs out of it and it was still a nice size with a slice of charred pineapple and a small bowl of fresh pineapple on the side.

In the picture, it is iced with cream cheese icing. You can store this in the fridge for up to 4 days. The size and icing and shape are up to you. You can make this in a 9×13 pan and reduce the cooking time to 32 min and make little squares.

It’s all up to you and remember to have fun and make it your own.

Healthy Pumpkin Muffins

Healthy Pumpkin Muffins

  • Servings: 12 Muffins
  • Difficulty: Easy
  • Print

I was looking for a muffin recipe that would be healthy and filling. A good go to snack for diabetics. This is what I came up with.

Ingredients

  • 1/3 cup unsweetened apple sauce
  • 1/2 cup of maple syrup or honey (I used honey)
  • 2 eggs at room temperature
  • 1/4 cup of milk of choice (I used almond milk)
  • 1 cup of pumpkin puree
  • 2 tsps of pumpkin spice blend
  • 1 tsp of baking soda
  • 1 tsp of vanilla extract
  • 1/2 tsp of salt
  • 1-3/4 cup of whole wheat flour
  • 1/3 cup of old fashioned oats, plus more to sprinkle on top
  • 2 tsp of raw sugar for a sweet crunch (optional)

Directions

  1. Preheat oven to 325 and grease muffin tin or use liners (I used silicon liners).
  2. In a large bowl, beat the apple sauce and honey together with a whisk.
  3. Add the eggs and beat well.
  4. Add the pumpkin puree, milk, pumpkin spice blend, baking soda, vanilla extract and salt.
  5. Add the flour and oats to the bowl and mix with a large spoon, just until combined, a few lumps are ok.
  6. Divide the batter evenly into the muffin cups. Sprinkle the tops of the muffins with about a tablespoon of oats followed by a light sprinkle of raw sugar if you like.
  7. Bake for 23-25 minutes or until a toothpick inserted into the muffin comes out clean.
  8. Place on cooling rack and let cool for a couple of hours. They taste better for some reason.

Nutritional facts per serving

  • Calories 131
  • Fat 2.3 g
  • Sugar 9.5 g
  • Carbohydrates 25.7 g
  • Protein 3.4 g
  • Fibre 3.2 g

You have a few options, if you don’t have apple sauce, or prefer not to use apple sauce, you can sub for extra virgin olive oil. You can make this recipe vegan – use maple syrup, flax eggs and non-dairy milk. You can do some add-ins like chocolate chips, chopped nuts or dried cranberries or even crystallized ginger. You would do this at the stage where you combine wet and dry ingredients.

Pumpkin spice, not everyone has some premade, if you don’t it goes like this. (1 tsp of ground cinnamon, 1/2 tsp ground ginger, 1/4 tsp ground nutmeg and 1/4 teaspoon ground allspice or cloves). You can also substitute the flour to white all purpose flour which makes this lighter and less dense.

As you see there are so many options for you, all you have to do is let your imagination go, have fun and make it your own.

Chili Spices

Chili spices

  • Servings: 3 Chili Recipes
  • Difficulty: Easy
  • Print

We all make chili. Be it with beef, turkey or vegetarian. I don’t know about you but I hate having to make sure I have enough of all my spices before I decide to make a chili. Chili is usually a comfort food and requires nothing more than a slow cooker. I find that the premade envelopes that are sold are just too salty for my taste. So to prevent the stress of pulling out all the spices, I’ve prepared a small batch ahead of time. Usually this is enough for 3 chili recipes.

Ingredients

  • 3 tbsp of chili powder
  • 3 tsp of cumin
  • 1 1/2 tsp of cayenne pepper
  • ¾ tsp of garlic powder
  • 1 1/2 tsp of onion powder
  • 3 tsp of salt
  • 3/4 tsp of pepper

Directions

  • Put in a small jar and shake well

Nutritional facts per serving

  • Calories 3
  • Fat 0 g
  • Sugar 0 g
  • Carbohydrates 0 g
  • Protein 0 g
  • Fibre 0 g

Make sure to shake well and you are all set. If you want to try this for the first time, just reduce everything by a third. I like a little heat in my chili so I put in cayenne pepper. You can put less if you don’t like that kick or more if you want it really hot. Be careful when you buy the chili powder, there is one that is called super hot and they aren’t kidding. I would never use that in this mixture. You could add some to your chili but be very very careful. I like it hot and a tablespoon makes it too hot.

This is a basic recipe, as always, have fun and make it your own.

Crustless Pumpkin Pie

Crustless Pumpkin Pie

  • Servings: 8 servings
  • Difficulty: Easy
  • Print

Who says pumpkin pie is only good at Thanksgiving. Well not I, that is for sure. The only thing that has stopped me in the past, is the calories and sugar content. Well, well, well, I found a recipe in the Canadian Diabetes book that reduced the calories dramatically and quite a bit of the sugar. It is still a treat.

Ingredients

  • 1 14oz can of pumpkin puree
  • ½ cup of sugar
  • ½ tsp of salt
  • ½ tsp of ground ginger
  • 1 tsp of cinnamon
  • ¼ tsp of ground nutmeg
  • ¼ tsp of ground cloves
  • 2 eggs, slightly beaten
  • 13 oz can evaporated skim milk

Directions

  1. In a large bowl, mix pumpkin, sugar, salt, and spices.
  2. Stir in the slightly beaten eggs and mix well.
  3. Add the evaporated milk (shake can before opening) and stir until smooth.
  4. Pour into a lightly greased glass pie plate (this recipe works best in a glass pie plate instead of metal)
  5. Bake in preheat oven of 400 for about 40 minutes or until knife inserted near the center of the pie comes out clean.
  6. Let cool and serve.

Nutritional facts per serving

  • Calories 107
  • Fat 1.3 g
  • Sugar 19.3 g
  • Carbohydrates 21.1 g
  • Protein 5.1 g
  • Fibre 0.5 g

Make sure to use pumpkin puree not pumpkin pie filling or the spices will be way off. I made mine with homemade pumpkin puree which is thinner so my pie was a little wet. But ohhh, the taste. Cutting the pie in 8 pieces is a nice size. You almost don’t notice that there is no crust. It would be nice but it is not necessary and when you think it would double the calories and add an extra 6 sugars if you are using graham cracker crust, I say no crust please.

To be honest even the pie crust I have on this blog, Sebreena’s pie crust, would add a little less sugar than the graham cracker crust but still adds about 75 calories. This is a great alternative if you are really looking to cut down on the fat, calories and sugar but still crave that sweet taste. I found the spice mixture better than pumpkin pie spice mix but here is where you have fun and make it your own.

Brazilian Carrot Cake

Brazilian Carrot Cake

  • Servings: 16 servings
  • Difficulty: Easy
  • Print

Aren’t pot lucks fun? We had our first in two years on my team at work. Well, I got a new recipe from it. (Thank you Juliana) I’ve altered it a little to reduce the fat (hope you are ok with that). She said this a traditional cake to be served with or without icing. A dessert should never be the focus in size or quantity but instead a nice finish to a good meal. This is such a treat.

Ingredients

  • 3 large carrots
  • 3 eggs
  • 1/2 cup of apple sauce
  • 1 cup of sugar
  • pinch of salt
  • 2 cups of flour (I used unbleached)
  • 1 tbsp of baking powder

Directions

  1. Put carrots, eggs, applesauce, and sugar in food processor and chop finely.
  2. In a separate bowl, mix flour, salt and baking powder together.
  3. Add wet mixture of carrot and fold in.
  4. Spray bundt pan.
  5. Pour mixture and place in preheated oven at 350.
  6. Cook for 50-55 minutes.
  7. Let cool and serve.

Nutritional facts per serving

  • Calories 125
  • Fat 1.1 g
  • Sugar 14.1 g
  • Carbohydrates 26.9 g
  • Protein 3.4 g
  • Fibre 1.1 g

I serve small pieces. I also didn’t add any icing. Juliana had added a nice chocolate icing to hers for the pot luck. I found both ways delicious. You will want a larger piece but with it being so satisfying, no need for excess. I made mine with regular white unbleached flour. She mentioned using half white and half almond flour, I was out. Using half whole wheat would make it heavier but more filling and healthier. Either way, have fun and make it your own.

Oatmeal Waffle

Oatmeal Waffle

  • Servings: 8 servings of a half waffle
  • Difficulty: Easy
  • Print

I got a new waffle maker for Christmas from two very sweet boys. I was suggested to lower the fat to use half applesauce and half oil in the batter. Turns outs that a half waffle is more than enough with some toppings and sides for a complete breakfast.

Ingredients

  • 1 cup of all purpose flour (I used unbleached)
  • 3/4 cup of whole wheat flour
  • 1/2 cup of quick cooking oats
  • 1 tbsp of packed brown sugar
  • 1 tbsp of baking powder
  • 1/4 tsp of salt
  • 2 cups of nonfat milk (high protein) (I use lanctancia)
  • 2 eggs
  • 1 tbsp of apple sauce
  • 1 tbsp of vegetable oil

Directions

  1. Mix flours, oats, brown sugar, baking powder, and salt in a large bowl.
  2. Whisk milk, eggs, apple sauce and oil in a medium bowl.
  3. Whisk milk mixture into dry ingredients just until dry ingredients are thoroughly moistened.
  4. Allow batter to rest 5 minutes.
  5. Preheat waffle maker.
  6. Pour 1 cup batter onto the center of the grid.
  7. Bake until waffle is brown.

Nutritional facts per serving

  • Calories 192
  • Fat 5.5 g
  • Sugar 3.5 g
  • Carbohydrates 26.6 g
  • Protein 8.8 g
  • Fibre 2.4 g

On my first run, I had a whole waffle. Oh boy, that was way too much. Especially since I serve mine with a side of scrambled eggs, cheese and the waffle is topped with greek nonfat plain yogourt and fruit. This is much better than any frozen store bought waffle. You can freeze left over waffles wrapped with parcheman paper between each, once cooled. Just let them thaw and put in the toaster or oven at 350 for 10 minutes. It leaves that nice crunchy outside and warm inside. You can top these anyway you like. This is where you have fun and make it your own.

British Homemade Baked Beans

British Homemade Baked Beans

  • Servings: 6
  • Difficulty: Easy
  • Print

Baked beans, something a lot of Quebecers love. The traditional recipe has lots of molasses and brown sugar. I was looking for something that would have a little less sugar. After a some research I came across a few different recipes for British Baked Beans. This is a tomato based recipe. I had never had these so I thought, what the heck. Turns out this is quite good.

Ingredients

  • 1 tbsp of olive oil
  • 1/2 red onion finely chopped
  • 1 garlic clove finely chopped
  • 1/2 tsp of sea salt
  • 1/4 tsp of pepper
  • 2 tsp of sugar (preferably brown)
  • 1/2 tsp of smoked paprika
  • 1/2 tsp of dried oregano
  • 1/2 tsp of worcestershire sauce
  • 800 gr of cannellini beans or navy beans canned (see below for raw beans)
  • 400 ml of Passata (or ground or crushed tomatoes in a can, more economical)
  • 1 tbsp of tomato paste
  • 1 tbsp of parsley (optional)

Directions

  1. Heat the oil in a large pan and cook the red onion and garlic over medium heat for 5 minutes.
  2. Add salt, pepper, sugar, smoked paprika, and oregano to the onion mixture.
  3. Pour in the passata, worcestershire sauce, and drained and rinsed beans.
  4. Simmer for 15 minutes or until you achieve your required sauce thickness.

Nutritional facts per serving

  • Calories 242
  • Fat 3 g
  • Sugar 5 g
  • Carbohydrates 42 g
  • Protein 14 g
  • Fibre 10 g

This was pretty easy. I personally don’t like canned beans so I used raw. I soaked them overnight. Then simmered them for about 1-1/2 hours or until they were tender but not quite mushy. To get 800 gr you need 650 gr of raw beans. I also used cannellini beans. If you are someone who likes beans but is watching your sugar and fat intake, this is the recipe to go with.

This goes great with breakfast for extra protein, with lunch as a side, or served with toast. Of course, if you want some spice you can always add some hot peppers. How you serve it, when you serve it, or with what you serve it, is all up to you. Just have fun and make it your own.

Slow Cooker Apple Butter

Slow Cooker Apple Butter

  • Servings: Makes 1 litre or 4 cups
  • Difficulty: Easy
  • Print

Apple season is upon us. When a coworker brought me apples from her back yard, I was wondering what to do with them and then someone suggested apple butter. I’d never made apple butter, so a trusted aunt gave me her recipe.

Ingredients

  • 3 lbs of cored and diced apples
  • 3 tbsp of maple syrup
  • 1 1/2 tsp of ground cinnamon
  • 1/4 tsp of ground nutmeg
  • 1/4 tsp of ground allspice
  • 1 tsp pure vanilla extract
  • Tiny pinch of kosher salt

Directions

  1. Make sure to weigh your apples after they are cored.
  2. Place at bottom of large slow cooker (5 quart or larger)
  3. Top with maple syrup, cinnamon, nutmeg, and allspice and stir to combine.
  4. Cover and cook on high for 3-4 hours or on low for 8-10 hours, stirring once halfway through, until apples are very tender and brown.
  5. Transfer the apples to a blender or food processor, blend until smooth. You will need to do this in batches. Then return to the slow cooker.
  6. Turn the slow cooker to high and let the apple butter continue to cook uncovered for 2 additional hours or until it reached its desired thickness. Stir occasionally and add in vanilla and salt.
  7. Depending on how sweet the apple is that you’ve used, you may feel you need to add some more maple syrup.

Nutritional facts per Serving (2 tbsp)

  • Calories 56
  • Fat 1 g
  • Sugar 11 g
  • Carbohydrates 14 g
  • Protein 1 g
  • Fibre 4 g

This is easy. Due to the fact that you don’t peel the apples, it adds extra fibre. Mine turned out, not as thick as I’d have liked but it was still great. I only cooked it another hour thinking it was thick enough. Should have followed the recipe. I was told that depending on the sugar content of your apple, example honeycrisp, it will be sweeter and will thicken more quickly. You can store this in airtight containers in the fridge for up to 2 weeks, or freeze for several months. Just thaw in the fridge overnight.

With most of my recipes, you can alter this, a little sweeter, a little less, thicker, more cinammon. Macintosh apples, honeycrisp, Gala, whichever you choose. This is a great way to use apples that you have too many off. So have fun and make this your own.

Best Dry Rub

Best Dry Rub

  • Servings: 10
  • Difficulty: Easy
  • Print

Dry rubs are mainly used on ribs to amplify their flavour. I have used this same rub on chicken, ribs of course and even liver. Yes liver.

Ingredients

  • 1/4 cup of packed brown sugar
  • 2 tsp of salt
  • 2 tsp of black pepper
  • 2 tsp of smoked paprika
  • 1 tsp of garlic powder
  • 1 tsp of onion powder
  • 1 tsp of ground mustard
  • 1/2 tsp cinnamon
  • 1/2 tsp celery seed
  • 1/4 tsp cayenne pepper

Directions


Mix all ingredients together. (make sure that the brown sugar is well broken up)

Nutritional facts


– Calories 26
– Fat 0.2 g
– Sugar 5.0 g
– Carbohydrates 6 g
– Protein 0.2 g
– Fibre 0.4 g

As you can see, that was easy. You can store in an airtight container for up to a month. I’m new to using rubs. I found this one online and have made it few times now. Yes, I did used it on liver. You can make it spicier, sweeter, or any influence you want. I do recommend that if you use use spices like oregano and such, make sure that they are ground. So, have fun and make this your own.